 |
Fig.1 Damaged
Easel |
|
By Gary Boutin
Tools and Supplies:
Extension cords
Porter Cable Random Orbital Sander Corded
Sandpaper 60-grit to 120-grit
This Light-Duty H-Frame Beechwood Art Easel was purchased at a garage sale with many scratches and paint specks. After it was assembled it
was decided to sand all the bad areas that had flaking finish or paint. The sanding process should have been done when the easel was disassemble
but when the easel was assemble and under several high intensity work lights, it made it easier to see the damage to the easel.
This post shows the seven steps on how this H-Frame Beechwood Art Easel was sanded.
Step 1: Fig.1 shows the assembled H-Frame Beechwood Art Easel.
Fig.2 shows the sanding box which contains a Porter Cable Random Orbital Sander with many hook and loop sanding discs. With this type of sander it is extremely easy to remove more wood than needed. The job must be done carefully.
 |
| Fig.2 Sander kit |
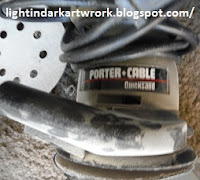 |
Fig.3 Porter Cable
Random Orbital
Sander |
Step 2: Fig.4 and
fig.5 shows the type of sanding disk purchased at Home Depot. This package is at 60 grit and remove the damages very fast.
Pickup the sander often to check that the wood is not being removed.
Fig.5 shows the holes in the sanding discs, their purpose is to remove the sawdust and not get in the way of the paper. The theory is the more holes the better. Some of these sander pick up the sawdust through these holes and expel it out of the sander.
 |
Fig.4 Six inch wide
60-Grit |
 |
| Fig.5 Sawdust holes |
Step 3: Fig.6 shows the top of the mast that had water mildew. Most of it has been sanded. It will be sanded again before the sealer is applied.
Fig.7 shows the rest of the easel mast was sanded from top to bottom and on both sides.
 |
| Fig.6 Mast top |
 |
| Fig.7 Total mast |
Step 4: Fig.8 and
fig.9 shows the mast has two side forming the H that hold the canvas and both side were sanded.
 |
| Fig.8 Left front |
 |
| Fig.9 Right front |
Step 5: Fig.10 and
fig.11 shows the front and the back of the base were sanded.
 |
| Fig.10 Back of base |
 |
Fig.11 Back of Mast and
side of easel base |
Step 6: Fig.12 and
fig.13 shows the back of the base and the middle bar of the top of the H was sanded.
Fig.14 shows the front, back and sides of the latch box that allows the canvas box up and down.
 |
| Fig.12 Back of base |
 |
| Fig.13 Top of H frame |
 |
Fig.14 Latch plate
moves canvas box |
Step 7: Fig.15 and
fig.17 shows the canvas holder.
Fig.16 will only need wax when the sealer has dried. This is a thumbscrew that pushes a plastic onto the mast thus protecting it from the screw.
 |
| Fig.15 Canvas Holder |
 |
| Fig.16 Only was here |
 |
Fig.17 Block
and thumbscrew |
How to Repair a Damaged Easel:
- Cookie Alert: European Union laws requires that you know that this blog uses cookies. If you are concerned about this please click here to see how Google uses this information.
Note: Light in Dark Artwork assumes no liability for omissions, errors or the outcome of any Artist projects. All rights reserved. © Copyright 2011-


No comments:
Post a Comment