 | |
| Fig.1 Wood Easel base |
Tools and Supplies:
Bolts, nuts, and washers
Drywall screws
Metal Drill bit 1/2 (.5) inch
Pan Head Phillip 3/4 inch screws (8)
Ryobi 18 volt Cordless screwdriver
Studio Light-Duty H-Frame Wood Art Easel
This Light-Duty H-Frame Beechwood Art Easel was purchased at a garage sale and was not assembled. The same model can be purchased at Dickblick Art Store® for $267.30.
This post shows five steps on how to re-assemble the H-Frame Art Easel from the mast legs to assembling the frame to the base. There are two section of the H-Frame Art Assembly #1 and #2.
Step 1: Fig.1 shows the painting easel base measures at 24 inch × 27 inch. Fig.2 shows one of the brass screws that will need to be removed to add the mast leg. There is a brass screw on both sides of the base. Fig.3 shows a bit holder with a Phillip head placing the brass screw and mast leg into the frame base. Now do this for the right side.
 |
| Fig.2 Right side |
 |
| Fig.3 Left side |
 |
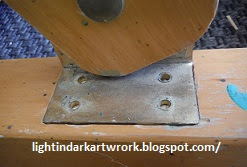
| Fig.4 Mast hinge plate |
 |
| Fig.5 Splintered area |
 |
| Fig.6 Add toothpicks |
 |
| Fig.7 Toothpicks in 4-areas |
 |
| Fig.8 Claw hammer |
 |
| Fig.9 Pound flat |
 |
| Fig.10 Area ready |
 |
| Fig.11 Hammer mast hinge flat |
 |
| Fig.12 Ready for new screws |
 |
| Fig.13 Pan Head Phillip screw |
 |
| Fig.14 Inserting Outside Phillip screws |
- Studio Design Assembly Instructions - Many choices to download.PDF
- Art easel building instructions - multiple site for all types of easels
- French Easel Instructions
- Part 1 of 3 - H-Frame Art Easel Introduction
- Part 2 of 3 - H-Frame Art Easel Assembly #1
- Part 3 of 3 - H-Frame Art Easel Assembly #2
- Handyman Blog: DIY Advisor
- Food Blog: From Kiwis To Pistachios
- Artwork Blog: Light in Dark Artwork
- Class-A Tests: DIY Class-A Drivers License Tests
- Class-A Tests Sitemap: Class-A Sitemap
- Cookie Alert: European Union laws requires that you know that this blog uses cookies. If you are concerned about this please click here to see how Google uses this information.
Note: Light in Dark Artwork assumes no liability for omissions, errors or the outcome of any Artist projects. All rights reserved. © Copyright 2011-

No comments:
Post a Comment