Showing posts with label paper template. Show all posts

Thursday, September 22, 2016

How to Make a Art Magazine Cardboard Holder - Part 1 of 3 - Cutting the Pattern

These are the large art magazine that need a box holder
Fig.1 Artist magazines
By Gary Boutin

Tools and Supply:
Adhesive Spray
Paper template
Permanent Marker (any color)  
USPS First Class Box (Used)
Scissors

My library of Art Magazine are spilling over my bookcase. A simple magazine plastic holder can cost over $4 each at office supply stores. Looking at a used USPS Mail box gave me an idea to upcycle a used USPS Mail boxes. This would provide a safe place to hold my large magazine and at the same time help the environment. Anytime you use a container for another purpose than its original purpose, this is an upcycling. DIY Craft have been doing this all along and now its a new trend.

This post shows the seven steps to make a Art Magazine Cardboard Holder. 

Step 1: Fig.1 shows the art magazine that need to have a new home. Fig.2 shows an empty used USPS Mail box ready for the trash. Fig.3 shows the box on its side near the plastic holder to see if this project could work.
A USPS cardboard container would be the preferred storage for magazines
Fig.2 Used Mail Box
The USPS cardbox is placed on its side to see if it could hold magazines
Fig.3 Box side-by-side
Step 2:  Fig.4 shows the box on its and a plastic holder on each side. The idea is to trace the pattern of the existing plastic holder on the mail box sides. Fig.5 shows the trace from the plastic holder. Fig.6 shows that mistakes happen. To correct this problem retrace the pattern on the box.
Place the box and the plastic container on its side to trace its pattern
Fig.4 Trace plastic 
holder both sides
The line on the box is a traced pattern of the new magazine holder
Fig.5 Trace line
This picture shows a bad trace and a good trace of the magazine holder
Fig.6 Wiggle are 
the mistakes solid are 
the correct line pattern
Step 3: Fig.7 shows to use strong scissors to cut the traced line. Fig.8 shows the two side by side. The boxed cardboard container is ready for its magazines. Part 2 will address the idea of painting the box. Part 3 will show how to decorate the magazine box.
Use strong scissors to cut the pattern on the box
Fig.7 Cut outline
Place the plastic and cardbox container together
Fig.8 Cardboard double

How to Make a Art Magazine Cardboard Holder:


  • Cookie Alert: European Union laws requires that you know that this blog uses cookies. If you are concerned about this please click here to see how Google uses this information.

 
Note: Light in Dark Artwork assumes no liability for omissions, errors or the outcome of any Artist projects. All rights reserved. © Copyright 2011-

Sunday, September 4, 2016

Home Made Brush Holder with all Plastic Parts - Part 1 of 6 - The Parts and Tools


This is the standard painter brush holder and cleaner
Fig.1 Brush holder
and cleaner
By Gary Boutin

Tools and Supplies:
Aviation metal Snips
Brushes Long Handle
Cordless 12-volt Drill with drilling bits (Ryobi ) 
DAP Kwik Seal Silicone Caulking
Drill Bit (Ryobi Drill Bits) 
Electrical Ties (small)
Gloves Nitrile
Metal Hardware Cloth
Paper (for template)
Pencil or Marker
Plastic Container 1-Gallon (old joint compound tub)
Plastic Fencing  (Poultry Netting)
Strong Scissors
Westpack Material All Purpose Tub

There plenty of ways to spend money on art. This post is all about saving money and spending it on paint. We need the extra accessories and many do purchase them like Fig.1 above right. This is an upcycling project.

This post shows the twelve steps on the assembly of a simple brush holder. 

Step 1: Find an empty wide bottom plastic container. Fig.2 shows the container below is from Westpack Material All Purpose Joint Compound. One gallon plastic buckets can be purchased at hardware stores for about $3 each. The choice is white, black and sometimes blue. Small container can also be purchased with lids.
This is a Westpack Material all purpose joint compound empty bucket
Fig.2 Plastic bucket
Step 2: Find or purchase plastic fencing. Fig.3 shows the plastic poultry netting. You can also use plastic netting. Just make sure the net has wide enough area for the brushes.
This poultry plastic netting is what was used to keep brushed standing up
Fig.3 Poultry Netting
Step 3: Fig.4 shows Ryobi Titanium Drill Set. Use a drill bit larger then the electrical ties.
These Titanium drills were purchased at The Home Depot
Fig.4 Ryobi 
Titanium Drill Set

Step 4: Fig.5 shows Ryobi 12 volt cordless drill with Makita drill bit holder.
12 Volt Cordless Drill with Makita Bit Holder
Fig.5 Ryobi 12-volt
Cordless Drill
Step 5: Fig.5 shows the use of a measurement tape to measure each top and bottom of the bucket.
Metal measurement tape
Fig.6 Tape

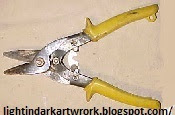
 Step 6: Fig.7 shows the Aviation Snips that will cut the plastic netting.
Aviation metal snitp is what is used to cut just about anything
Fig.7 Aviation Snips
Step 7: Fig.8 shows pliers will be needed to pull the electrical ties.
Standard pliers
Fig.8 Pliers
Step 8: Manual caulking gun used to finish the Bucket.
This is a well used manual caulking gun
Fig.9 Caulking
Step 9: Fig.10 shows the Long Brushes from your inventory that are placed for safe keeping.
These brushed need a new home, the brush holder
Fig.10 Art Brushes
Home Made Brush Holder with all Plastic Parts:
Other post that are brush containers:


  • Cookie Alert: European Union laws requires that you know that this blog uses cookies. If you are concerned about this please click here to see how Google uses this information.

 
Note: Light in Dark Artwork assumes no liability for omissions, errors or the outcome of any Artist projects. All rights reserved. © Copyright 2011-