Friday, July 14, 2017

How to Make Homemade Plastic Art Combs - Part 2 of 7 - Yogurt Cap

Fig.1 Yogurt with plastic top
By Gary Boutin

Tools and Supplies:
Art paper
Aviation cutters
Plastic bottles (Including water bottles)
Plastic fruits containers
Scissors
Utility knife (with sharp new blades)

Art Combs are used for kid's art and provides patterns for the artist paintings. Need that extra special texture or pattern, create your own art combs. This post shows how easy to make, use, and clean your own art combs. Each comb will be tested on watercolor paper to test its effectiveness.

This post shows five steps to make homemade inexpensive art combs from a clear or opaque yogurt container top.

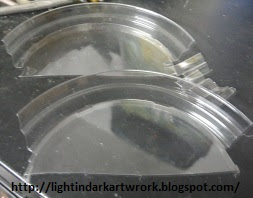
Step 1: Fig.2 through fig.5 shows the yogurt container being transformed into a plastic art comb. Fig.2 show scissors was used to cut the yogurt top in half. Fig.3 shows two blank combs, fig.4 shows scissors was used to cut the teeth (diamond shapes) out of the plastic yogurt top. Fig.5 shows the comb ready to use.
Fig.2 Scissors cut top in half
Fig.3 Top cut in half
Fig.4 Scissors create the shape
Fig.5 Homemade plastic comb
Step 2: Fig.6 and fig.7 shows the the new comb placed into the paint.
Fig.6 Acrylic paint
Fig.7 Dip comb in paint
Step 3: Fig.8 shows the pattern the homemade comb created on the water color paper.
Fig.8 Paint patterns on paper
Step 4: Fig.9 shows that the comb could be cleaned in the sink if you wanted to reuse it.

Fig.9 Cleaning the comb
Step 5: Resolution: This homemade comb would be better if the plastic was thicker and heavier. The clear plastic yogurt top sheds paint and thus was difficult to use as comb. It might work if the comb was spreading paint on the canvas or paper. The yogurt cap comb was easy to clean and could be used again.

Interesting Links about combs painting:

  • Cookie Alert: European Union laws requires that you know that this blog uses cookies. If you are concerned about this please click here to see how Google uses this information.

Note: Light in Dark Artwork assumes no liability for omissions, errors or the outcome of any Artist projects. All rights reserved. © Copyright 2011-

Tuesday, July 11, 2017

How to Make Homemade Plastic Art Combs - Part 1 of 7 - The Tools

Fig.1 Homemade plastic comb
By Gary Boutin

Tools and Supplies:
Art paper
Aviation cutters
Acrylic paint (Poster paint)
Liquitex Deep Portrait Pink paint
Plastic Art Combs
Plastic bottles (Including water bottles)
Plastic fruits containers
Scissors
Utility knife (with sharp new blades)
Watercolor Block Rough Block 472-15 Series (15 by 20 in.)

Art Combs are used for kid's art and each comb provides four choices of patters for the artist. But why not use these combs for adult art. Need that extra special texture or pattern, create your own art combs. Blick Art Materials® is my art art store of choice, sells a pack of four Roylco Paint Scrapers® for their price of $5. The pack has 4-patterns and are easy to clean and use.

This post shows how easy to make, use, and clean your own art combs. Each comb will be tested on watercolor paper. When the combs are created, the artist is in complete control of what shape is being made and this can add fabulous and interesting shapes to your painting.

This post shows three steps of the tools needed to make inexpensive art combs.

Step 1: Fig.2 through fig.6 shows the plastic bottles and plastic fruits containers used to make these plastic combs. When you purchase fig.2 water, fig.3 naked juice, fig.4 fruit juices, fig.5 strawberries containers, fig.6 yogurt containers, can be used to provide the medium (plastic structure) for your combs.
Fig.2 Opaque 
Plastic
Water Bottle
Fig.3 Semi Clear 
Naked
Juice Bottle
Fig.4 Clear
Plastic
Juice Bottle


Fig.5 Strawberries containers
Fig.6 Yogurt containers


Step 2: Fig.7 and fig.8 shows the cutting tools needed, aviation cutters and utility knife with a sharp blade. The aviation cutter are used because some of the plastic is to dense to cut with just a utility knife and the best reason is that it is a safer tool than using a utility knife with a sharp blade. Fig.8 shows strong sharp scissors can help cut the shapes into the plastic walls of each containers.

Fig.7 Aviation Cutters
and Utility Knife
Fig.8 Strong scissors

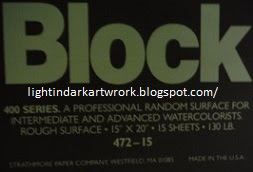
Step 3: Fig.9 and fig.10 shows paint and paper. Any type of paint can be used to test each comb. For example poster paint which is inexpensive to purchase can be used to see if the comb give the effect that is needed. For this post Liquitex Deep Portrait Pink paint was used. Fig.10 shows Block Watercolor Rough Block 472-15 Series (15 by 20 in.). Any type of art paper that can absorb water is perfect to see if the comb produces the effect needed for the painting.

Fig.9 Liquid paint
Fig.10 Watercolor Paper

Interesting Links about combs:


  • Cookie Alert: European Union laws requires that you know that this blog uses cookies. If you are concerned about this please click here to see how Google uses this information.

 
Note: Light in Dark Artwork assumes no liability for omissions, errors or the outcome of any Artist projects. All rights reserved. © Copyright 2011-

Monday, July 10, 2017

How to Make a Brush from a Worn Out Yellow Straw Broom

Fig.1 Ordinary Kitchen 
Yellow Straw Broom
 By Gary Boutin

Tools and Supplies:
Matches
Nylon Twine
Yellow Straw Broom (Worn out)
Wood glue (Titebond)
Wire (thin)

There never seem to be enough money to purchase all the supplies needed to paint with on my canvases. My current thinking is the many ways to get my project done as inexpensive as possible. When the garage was cleaned a old broom needed to be disposed, instead of trashing it, the straw strands were removed and a brush was created. Below are those steps.

This post shows the eight steps of how to make a straw brush.


Step 1: Fig.1 and fig.2 shows the broom that was used to create this painting brush. The entire broom could make easily several brushes. Fig.2 shows that a utility knife was used to cut the straw strands away from the base of the broom. Fig.3 shows the cut straw strands that are the painting fibers of this homemade brush.
Fig.2 Cutting the straw
Fig.3 Straw strands
Step 2: Fig.4 shows that the next step is to gather the straw strands on a wooden handle. A wood stick was with nylon twine to gather the strands together.
Fig.4 Wrapping the straw on a wood stick
Step 3: Fig.5 shows that the straw strands are on the handle, but to prevent the nylon twine from unwrapping itself, the use of matches will be used to fuse the ends to the base of the handle. The matches must be lit and its the fire fuses the nylon thread from unwrapping. Fig.6 shows the nylon twine has been fused.  

Fig.5 Use lit matches 
to fuse the nylon end
Fig.6 Nylon twine fused
Step 4: Fig.7 shows the brush is assembled. Fig.8 shows that to protect the wood handle and to provide another layer of protection a wood sealer was used on the brush handle.

Fig.7 After the glue
Fig.8 Wood sealer 
for wood handle
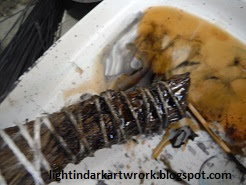
Step 5: Fig.9 shows the application of the wood sealer.
Fig.9 Dark sealer
Step 6: Fig.10 shows that a metal loop was added to the end of the brush to be able to hang the brush while drying.

Fig.10 Metal brush handle
Step 7: Fig.11 shows the application of the wood sealer to the brush handle. Fig.12 shows the handle completely covered with the sealer.

Fig.11 Applying first coat
Fig.12 Several coats
Step 8: Fig.13 shows the finished brush. The metal loop at the top of the brush handle provided a way to dry the fibers after each painting projects. Once the brush was finished it made a handy little broom or brush. The wood sealer does not need to be applied if the brush is only going to be used once. The wood sealer was added to make the brush handle last while cleaning with water and soap. The yellow brush straw strands are not the finest quality for detail painting but this brush can add another tool that could be used in your painting.

Fig.13
Finished 
Brush


  • Cookie Alert: European Union laws requires that you know that this blog uses cookies. If you are concerned about this please click here to see how Google uses this information.

 
Note: Light in Dark Artwork assumes no liability for omissions, errors or the outcome of any Artist projects. All rights reserved. © Copyright 2011-

How to Make a Round Canvas Frame

Fig.1 Wire 
Aviation Snips
By Gary Boutin

Tools and Supplies:
Aviation Metal Snips
Butt Splices 10 A.W.G. Clear
Canvas cloth
Chain Link Wire gauge #9
Hacksaw
Heavy Needle (Curve is better)
Heavy waxed thread Metal wire
Paper clips (large)
Scissors (cloth)

In the past all my canvas rectangular frames were made of 2x4-wood with metal L-brackets. This project goal is to create a round canvas using fencing wire. A novel approach to artwork. If you shop for a round frames, or a round canvas there are none. You can purchase oval canvas and oval wood or plastic frames. This round frame and canvas could be used to highlight a special painting. 

This post shows the eleven steps on how to make a oval canvas. 

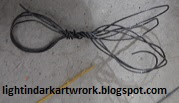
Step 1: Fig.1 shows the tool that will cut the fence wire. This wire was purchased from the Home Depot. Fig.2 shows chain link wire gauge #9 that will be the back bone for this canvas.

Fig.2 Chain Link 
Wire gauge #9
Step 2: #9 gauge wire 50 feet cost $10.98 before taxes. This canvas has a circumference of 12 inches (304.8 mm)
Fig.3 Canvas Frame
Step 3: Fig.4 and fig.5 shows the type of canvas needs to be chosen. Below this is heavy canvas purchased at a local linen store.
Fig.4 Heavy Canvas
Fig.5 Laying the Canvas
Step 4: Fig.6 shows the wire on the canvas. Choose the canvas diameter. Fig.7 shows its not that easy.
Fig.6 Wire on canvas
Fig.7 Pull enough wire
Step 5: Once the circumference has been measured, 37-inches (939.8 mm) cut the wire with aviation snips. It can be difficult to cut this wire, use a hacksaw if your cutter will not cut the chain link wire.
Fig.8 Cut the wire
Fig.9 Use Aviation Snips
Step 6: Fig.10 shows a #10 Butt splice used to pull the ends together.

Fig.10 Butt Splice
Step 7: Fig.11 shows the metal circle on the pre-cut canvas. Try to get the wire to be in a circle. It does spring back and the spring can be difficult. Fig.12 shows that paper clips were used to get the edges around the frame.
Fig.11 Wire on canvas
Fig.12 Paper Clips
Step 8: Fig.13 shows the use heavy waxed thread with a strong needle and thread around the circle. Not having done much sewing this was also a joy to do. Fig.14 shows a heavy needle. Fig.15 shows to thread around in a circle. The Gesso will tighten the canvas, this is just to keep it on the frame.
Fig.13 Heavy Waxed Thread
Fig.14 Heavy Needle
Fig.15 Thread the circle
Step 9: Fig.16 shows that the canvas is stretched tightly. Tighten the waxed thread. Fig.17 shows the canvas is ready to be painted. Not a complete circle but this is a first attempt.
Fig.16 Tighten the canvas
Step 10: Finished. Now its time to paint the dry canvas with Gesso paint and then the canvas is ready to be painted.

Fig.17 Finished
Step 11:  Tabulation; Wire cost: 1.50, linen canvas cost: $2. This frame was made for $2.50 and its round and unusual.

  • Cookie Alert: European Union laws requires that you know that this blog uses cookies. If you are concerned about this please click here to see how Google uses this information.
 
Note: Light in Dark Artwork assumes no liability for omissions, errors or the outcome of any Artist projects. All rights reserved. © Copyright 2011-