 |
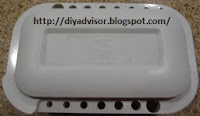
| Fig.1 Brush Accessories |
Tools and Supplies:
Aviation metal Snips
Brushes Long Handle
Channellocks pliers
Cordless 12-volt Drill with drilling bits (Ryobi )
DAP Kwik Seal Silicone Caulking
Duct tape (cloth)
Drill Bit (Ryobi Drill Bits)
Electrical Ties (small)
Gloves leather
Metal Hardware Cloth
Paper (for template)
Pencil
Plastic Container 1-Gallon (old joint compound tub)
Plastic Fencing (Poultry Netting)
Strong Scissors
Westpack Material All Purpose Tub
There plenty of ways to spend money on art. This post is all about saving money and spending it on paint. We need the extra accessories and many do purchase them like Fig.1 above right.
This post shows the five steps on the assembly of a brush holder.
Step 1: Fig.2 below shows that this is the fit you want. The bottom layer slightly higher to catch the bottom of the brush.
Step 2: Fig.3 shows to take the bucket and add some DAP Kwik Seal Silicone Caulking at the bottom edges of the bucket.
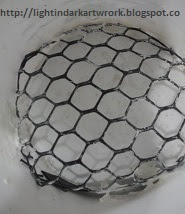 |
| Fig.2 Perfect fit with Silicone |
 |
| Fig.3 Caulking |
Step 5: Fig.4 shows both nets fit correctly. The next post shows how to assemble the brush bucket.
 |
| Fig.4 Good fit for top and bottom |
- Part 1 of 6 - The Parts and Tools
- Part 2 of 6 - Template and Cutting
- Part 3 of 6 - Top and Bottom Fit
- Part 4 of 6 - Drilling & Assembly
- Part 5 of 6 - Painting
- Part 6 of 6 - Final
- How to Make a Brush Holder from a Yoghurt Container
- How to Make a Red Brush Holder from a Protein Container
- Handyman Blog: DIY Advisor
- Food Blog: From Kiwis To Pistachios
- Artwork Blog: Light in Dark Artwork
- Class-A Tests: DIY Class-A Drivers License Tests
- Class-A Tests Sitemap: Class-A Sitemap
- Cookie Alert: European Union laws requires that you know that this blog uses cookies. If you are concerned about this please click here to see how Google uses this information.
Note: Light in Dark Artwork assumes no liability for omissions, errors or the outcome of any Artist projects. All rights reserved. © Copyright 2011-

No comments:
Post a Comment