Monday, December 26, 2016

How to Make a Brush from a Worn Out Black Plastic Broom

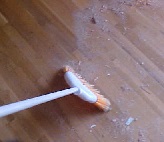
Fig.1 Worn-out  
floor broom
By Gary Boutin

Tools and Supplies:
Worn out black fiber broom
Leather dye, dark brown
Razor Knife (Sharp blade)
Scissors
Titebond™ wood glue
White twine or nylon twine

This post is about how to make a artist paint brush out of an ordinary kitchen broom with black plastic fibers. It is the best way to solve any problems learning the assembly of the brush. Once that the problem is solved then you can purchase animal hairs to produce quality brushes.


This post shows the eight steps of how to assemble a brush from an worn out kitchen broom.

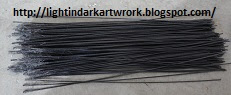
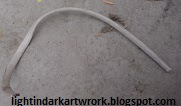
Step 1: Fig.1 shows a modern broom and fig.2 shows the plastic fibers that will be cut to make our artist brush. Fig.3 shows what was cut from the broom head (plastic fibers). The advantage of using a worn kitchen broom with plastic fibers is that the plastic fibers are much thicker and easier to handle than fur hairs. The advantage of fur hair is that the skin is attached to the natural hair and thus will be a better brush.
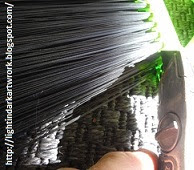
Fig.2 Cutting the broom fibers
Fig.3 Plastic fibers
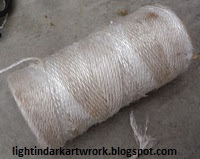
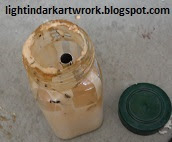
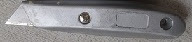
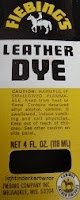
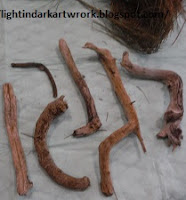
Step 2: Fig.4 through fig.10 shows the components of this artist brush. Fig.4 shows trimming scissors to cut the plastic fibers straight. Fig.5 shows white parcel twine, fig.6 shows Titebond™ wood glue. Fig.7 shows the razor knife that will be used to cut the plastic fibers from the kitchen broom. Fig.8 shows dark brown leather dye to paint the twine fibers. Fig.9 shows a strand of telephone wire that will be added at the but of the brush to assist in drying. Fig.11 shows Birch wood tree branches acquired while walking though our wooden areas.
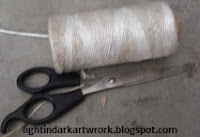
Fig.4 Trimming scissors

Fig.5 White parcel nylon twine
Fig.6 Titebond™ wood glue
Fig.7 Razor knife
Fig.8 Leather 
black dye
Fig.9 Telephone cord
Fig.10 Bitch wood handles
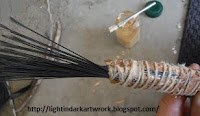
Step 3: Fig.11 through fig.13 shows the progression of surrounding the broom fibers around the handle. The brush starts by choosing a wood handle. Fig.10 shows some wood handles that was found in our near by woods. Not all  are straight most of bent, crooked and very different from the normal straight painting brush. Fig.11 shows that the plastic fibers are placed around the wood handle. Fig.12 shows an over abundance of glue added to the fibers and the wood handle. Fig.13 shows the brush fibers are held by twine, at first the twine is spaced apart and then more glue is added to secure the fibers in place.
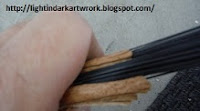
Fig.11 Surround handle
Fig.12 Add wood glue
Fig.13 Wrap the broom

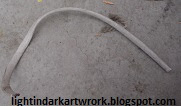
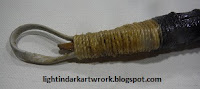
Step 4: Fig.14 and fig.15 shows the application of the brush end. A loop was added so that when the brush was wet after cleaning the brush could dry without damaging the brush fibers. Fig.14 shows that wood glue covers the entire tip of the but of the brush handle. Fig.15 shows the plastic loop that will be added to the brush.
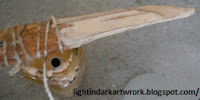
Fig.14 Glue the top
of the handle
Fig.15 Add this 
telephone wiring
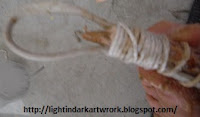
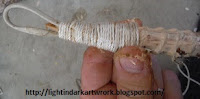
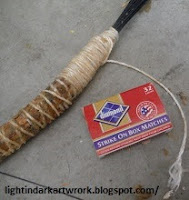
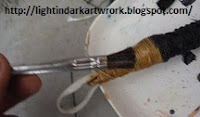
Step 5: Fig.16 through fig.18 shows the progression of finishing the handle loop. Once the wire in this case a telephone wire is chosen cut it to leave a loop at the top of the handle and 2 to 3-inches overlap over the handle. The plastic loop will be wrapped tightly with parcel twine and wood glue to secure it in place. Fig.16 and fig.17 shows the twine at tightly wrapped at the tip to hold the plastic wire in place. Fig.18 shows the finished process. The loop is completely covered  and ready to use. Different twine will leave different affect on the brush handle. Fig.19 shows the twine being trimmed by a match. If the twine as any poly nylon then the secure the ends of the twine a match is needed to seal the end of the twine. If not a secure knot will work well. 
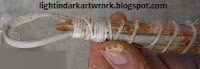
Fig.16 Wrap the wire 
Fig.17 Around the 
wood handle
Fig.18 Wrap it tightly
Fig.19 Use Matches to trim 
the end of the nylon string
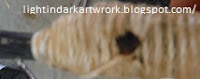
Step 6: Fig.20 and fig.21 shows the use of a lite twine being sealed so the twine will not become untangles from its Birch wood handle. Fig.20 shows the twine is on fire and fig.21 shows a black dot on the twine showing its sealed forever.
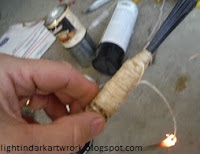
Fig.20 Fire on nylon twine
Fig.21 Twine tip is safe

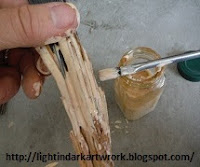
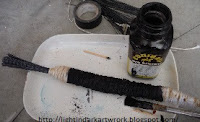
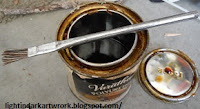
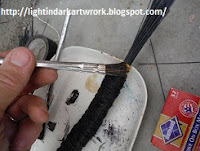
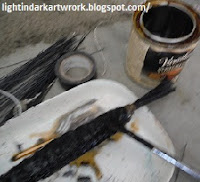
Step 7: From here the brush is finished. Fig.22 through fig.28 just shows additional steps to forever seal the twine to the brush handle. Fig.22 and fig.23 shows a dark brown leather dye that was used to make the brush handle very dark. Fig.24 through fig.28 shows the progression of adding a protective layer on the wood and twine handle.
Fig.22 Dye
Fig.23 Add dye to the handle

Fig.24 Varathane
Fig.25 Add to butt tip
Fig.26 Another coat
Fig.27 Brush wood tip
Fig.28 Nice coat


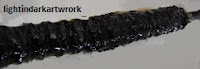
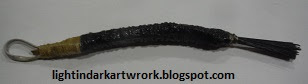
Step 8: Fig.29 through fig.31 shows the highlights of this brush. Fig.29 shows the painting brush fibers. Fig.30 shows the butt of the brush and its nice plastic loop. Fig.31 shows the brush now is ready for use. It acts very much like a broom that it fibers are very stiff. It acts very much like a small broom. But this is the best way to practice your brush technique. Another post will be written to show how each brush handle its way in acrylic paint.
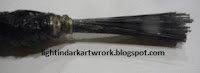
Fig.29 Not on brushes
Fig.30 Brush handle
Fig.31 New Broom brush


  • Cookie Alert: European Union laws requires that you know that this blog uses cookies. If you are concerned about this please click here to see how Google uses this information.

 
Note: Light in Dark Artwork assumes no liability for omissions, errors or the outcome of any Artist projects. All rights reserved. © Copyright 2011-
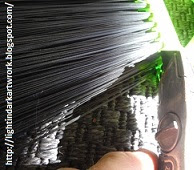
Tuesday, December 13, 2016

How to Use Paper Business Cards to Create Paint Stencils

Fig.1 Business Cards
By Gary Boutin

Tools and Supplies:
Business cards
Sink
Water

This post shows that business cards can be used
as artist stencils. The one true fact is many people use business cards, and business cards either paper or plastic make good stencils to create a patterns. This post shows the majority of the business cards are paper, and the others are embossed paper. The best reason to use business cards is that most  cards come to our homes unsolicited. So we can the business cards without guilt of destroying them.

This post shows the eight steps that shows the use of business cards as art painting stencils with acrylic paint on watercolor block paper. 

Step 1: Fig.1 shows the business cards that will become art stencils. Fig.2 shows the watercolor block that will be used to show how each stencils is painted on the watercolor block paper. Fig.3 shows a television tray used as a palate paint tray. The sink is needed to be used to clean the paper stencils.
Fig.2 Watercolor block
Fig.3 TV tray paint tray
Step 2: Fig.4 through fig.6 shows the progression of the v-shaped business card stencil. Fig.4 shows a large v-cut stencil ready to be used. This business card had high gloss printing and was similar to card stock. Fig.5 shows that pink, yellow and aqua paint has been added to the stencil. Fig.6 shows a v-pattern from the stencil on the watercolor block paper. 
Fig.4 V-shaped 
business card stencil
Fig.5 V-shaped stencil 
with acrylic paint
Fig.6 V-Stencils on paper
Step 3: Fig.7 through fig.9 shows the progression of the teeth-shaped business card stencil. Fig.7 shows the teeth-shaped business card stencil cut with a pair of scissors. Fig.8 shows the teeth-shaped stencil covered with paint at its tip. Fig.9 shows the impression of the teeth-shape on watercolor block paper.
Fig.7 Teeth-shaped stencil
Fig.8 Teeth-shaped 
with paint
Fig.9 Teeth Stencils on paper
Step 4: Fig.10 through fig.12 shows the progression of the straight line-shaped business card stencil. Fig.10 shows the straight line stencil was cut with a pair of scissors. Fig.11 shows the application of paint to the tips of the straight-line business card. Fig.12 shows the stencil pattern on the block watercolor paper.
Fig.10 Straight line stencil
Fig.11 Straight line with paint
Fig.12 Straight line on 
watercolor paper
Step 5: Fig.13 and fig.14 shows the progression of the large teeth-shaped business card stencil. Fig.13 shows the stencils have paint applied to its tips and fig.14 shows the tips are dragged onto the watercolor paper.
Fig.13 Large-teeth stencils
Fig.14 Large-teeth 
on watercolor paper
Step 6: Fig.15 and fig.16 shows the progression of the round tipped-shaped business card stencil. This round-tipped stencil was cut using scissors, if the round part is difficult use a hole punch to get a perfect round cut on all parts of this stencil. Fig.15 shows the round-tipped has acrylic paint applied to it tip and body. Fig.16 shows the stencil being dragged on the block watercolor paper. 
Fig.15 Round-tipped stencils
Fig.16 Round-tipped 
stencils on watercolor paper
Step 7: Fig.17 through fig. 19 shows how each stencil survived the washing of the acrylic paint. Fig.17 large-teeth stencil did not fare well in the cleaning process. Its made of paper and the paint and water curled up the stencils and was unusable for future painting projects. Fig.18 and fig.19 also shows wet stencils that did not survived the cleaning process. All of these business cards were made of high gloss paper and could not be saved for future use for a painting stencil.

Fig.17 Wet large-teeth stencil
Fig.18 Wet v, teeth and 
straight paper stencils
Fig.19 Wet round, straight
and wriggly paper stencils
Step 8: Fig.20 through fig.22 shows bubble wrap with acrylic brown green acrylic paint. Fig.21 shows that this is not a good stencil because it just places a block of paint in one area and no clear definition of the wrapped paper is applied to the page. The only advantage of the bubble-wrap stencil is that the bubble plastic wrap is easy to clean and can be used again.
Fig.20 Bubble-wrap stencil
with brown acrylic paint
Fig.21 Block of solid paint
Fig.22 Cleans easily
Business card stencils are perfect for one time use and it give the business card a new life rather than throwing them in the garbage can. Using your imagination can give these stencils a new way to have a repeated pattern on any of your artist paintings. Professional would probably not use these cheap stencils but this could be a fun project for children. The only problem is that a responsible person would have to cut the business cards. 

Interesting Internet Sites:


  • Cookie Alert: European Union laws requires that you know that this blog uses cookies. If you are concerned about this please click here to see how Google uses this information.

 
Note: Light in Dark Artwork assumes no liability for omissions, errors or the outcome of any Artist projects. All rights reserved. © Copyright 2011-

Tuesday, December 6, 2016

How to Protect Your Very Expensive Delicate Artist Brush Tips

Fig.1 Soap dispenser cap
By Gary Boutin

Tools and Supplies:
Artist brushes various sizes
Black rubber tubing
Clear plastic tubing
Coffee stirs
Milk shake straws
Plastic bendable straws
Pink plastic brush tubing

This post cover the inexpensive alternative choices to protecting art brush tips. Some brushes can be very expensive. I am proposing is that simple plastic cover that is added over the brush tip to protect the tip from bending, fraying and damages.

This post shows the seven steps of inexpensive alternative that accomplish to protect artist brush tips. 

Step 1: Fig.1 and fig.2 shows a soap container cap and tube. Fig.2 shows the clear tubing has been removed from the soap cap. Keep the clear plastic tube and discard the rest of the soap cap. The clear tube is rigid white plastic and can protect brush tips from bending.
Fig.2 Take it apart
Step 2: Fig.3 shows is a white opaque plastic refrigerator water line. The tubing can be straiten out to accommodate a brush tip and finial.

Fig.3 Clear water line
Step 3: Fig.4 shows black rubber water lines. Rubber tubing if kept short can work well to protect brush tips
Fig.4 Rubber water lines
Step 4: Fig.5 shows bendable plastic straws in its container. Do not use the bendable part of the straw. Fig.6 shows wrapped in white paper is milk shake straws obtained at fast food outlets. Notice the bendable straws at the bottom of the picture.

Fig.5 Straw container
Fig.6 Milk shake straws

Step 5: Fig.7 shows one large brush with no plastic tip. The two fine tipped artist brush both have two plastic straws. For large brush obtain large plastic tubing at any local warehouse store or hardware store. Clear tubing can be purchased by bulk or by the foot to meet your standards.
Fig.7 Close up of the brush tip covers


Step 6: Fig.8 shows a many different artist brush with their covers. The only real artist cover purchased at an art store are in the middle of this picture and they have long plastic clear covers. In the middle of the page there are blue plastic straws that comes from our local fast food restaurant. The rest of the brushes are drinking straws of various sizes.
Fig.8 Each brush with each brush protector
Step 7: Fig.9 below shows that all the brushes are safe from damage.
Fig.9 Job done
All brushes safe


  • Cookie Alert: European Union laws requires that you know that this blog uses cookies. If you are concerned about this please click here to see how Google uses this information.

 
Note: Light in Dark Artwork assumes no liability for omissions, errors or the outcome of any Artist projects. All rights reserved. © Copyright 2011-

Friday, December 2, 2016

How to Make a Red Brush Holder from a Protein Container

Fig.1 
Protein container
By Gary Boutin

Tools and Supplies:
Protein container empty
Razor knife
Spray paint
Soldering gun
Wood chisel sharp

This is a continuing of my other post on how to hold your painting brushes. Heck this would work for anything resembling pencils, but it was designed for art brushes.

This post shows the six steps to creating two art brushes holder one standing up and the other lying on its side from the same protein containers. 

Step 1: Fig.1 through fig.3 shows the tools for this project. Fig.1 shows the empty protein container. Fig.2 shows the red spray paint used on this container (also seen on other post). Fig.3 shows the UTC-100 electric soldering gun.
Fig.2 Red 
spray paint
Fig.3 Iron
Step 2: Fig.4 through fig.6 shows the top and the sides of the container are the melted holes that will be used for by the brush handles. The brush will be placed upside down when placed in this container.
Fig.4
Fig.5
Fig.6
Step 3: Fig.7 and fig.8 shows the holes from made from the soldering iron and fig.8 shows a very sharp chisel was used to remove the plastic rings that was made from the soldering iron.

Fig.7 Sharp chisel
Fig.8 Rings 
removed

Step 4: Fig.9 shows to repaint the container for use. Melting the holes in the container showed the yellow plastic so the top had to be repainted.

Fig.9 Repaint
Step 5: Fig.10 shows the protein container is full of brushes and ready to use. Fig.11 shows the side view of the brush tree holder.


Fig.10 Side view
Fig.11 Top view
Step 6: Fig.12 shows the pieces of the container cut in half to create the side brush holder. Fig.13 shows the container on its side. Fig.14 shows the finished container with the art brushes.

Fig.12 Pieces
Fig.13 Finished
Fig.14


Other post that are brush containers:
Home Made brush Holder with all Plastic Parts:


  • Cookie Alert: European Union laws requires that you know that this blog uses cookies. If you are concerned about this please click here to see how Google uses this information.

 
Note: Light in Dark Artwork assumes no liability for omissions, errors or the outcome of any Artist projects. All rights reserved. © Copyright 2011-