 |
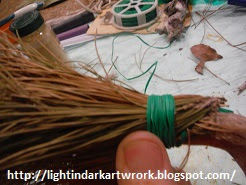
| Fig.1 Plant Wire |
Tools and Supplies:
Acid brush
Electrical tape
Fish line 60 lb.
Plant green tape
Plant green wire
Wood glue
We have many pine trees in our neighborhood. It seemed that pine needles could be used as paint brushes. All these pine needles are just for the taking and could make some fine brushes. This post address the assembly of a simple pine brush. In part-2 this post will address if the pine needle brush is a worthwhile brush for your studio.
This post shows the four steps for assembling a pine needle brush.
Step 1: Fig.1 shows the green plant wire that will be used to wrapped around the pine needles together. Fig.2 shows the wood glue used to keep the pine needles in place. Wood glue and green plant wire was used in combination to keep the needles in place.
 |
| Fig.2 Wood glue with brush |
 |
| Fig.3 Birch wood handles |
 | |
| Fig.4 Birch handle |
 |
| Fig.5 Pine needles and wood branch |
Note: A handle is not a priority, but it helps hold the needles in place.
 |
| Fig.6 Green plant wire |
 |
| Fig.7 Over an inch |
 |
| Fig.8 Trim the needles |
 |
| Fig.9 Wire is better |
 |
| Fig.10 Ready to paint |
How to Make a Pine Needle Brush:
- Part 1 of 2 - Assembly
- Part 2 of 2 - Did It Work
- Handyman Blog: DIY Advisor
- Food Blog: From Kiwis To Pistachios
- Artwork Blog: Light in Dark Artwork
- Class-A Tests: DIY Class-A Drivers License Tests
- Class-A Tests Sitemap: Class-A Sitemap
- Cookie Alert: European Union laws requires that you know that this blog uses cookies. If you are concerned about this please click here to see how Google uses this information.
Note: Light in Dark Artwork assumes no liability for omissions, errors or the outcome of any Artist projects. All rights reserved. © Copyright 2011-

No comments:
Post a Comment