Showing posts with label spray paint. Show all posts

Friday, December 2, 2016

How to Make a Red Brush Holder from a Protein Container

Fig.1 
Protein container
By Gary Boutin

Tools and Supplies:
Protein container empty
Razor knife
Spray paint
Soldering gun
Wood chisel sharp

This is a continuing of my other post on how to hold your painting brushes. Heck this would work for anything resembling pencils, but it was designed for art brushes.

This post shows the six steps to creating two art brushes holder one standing up and the other lying on its side from the same protein containers. 

Step 1: Fig.1 through fig.3 shows the tools for this project. Fig.1 shows the empty protein container. Fig.2 shows the red spray paint used on this container (also seen on other post). Fig.3 shows the UTC-100 electric soldering gun.
Fig.2 Red 
spray paint
Fig.3 Iron
Step 2: Fig.4 through fig.6 shows the top and the sides of the container are the melted holes that will be used for by the brush handles. The brush will be placed upside down when placed in this container.
Fig.4
Fig.5
Fig.6
Step 3: Fig.7 and fig.8 shows the holes from made from the soldering iron and fig.8 shows a very sharp chisel was used to remove the plastic rings that was made from the soldering iron.

Fig.7 Sharp chisel
Fig.8 Rings 
removed

Step 4: Fig.9 shows to repaint the container for use. Melting the holes in the container showed the yellow plastic so the top had to be repainted.

Fig.9 Repaint
Step 5: Fig.10 shows the protein container is full of brushes and ready to use. Fig.11 shows the side view of the brush tree holder.


Fig.10 Side view
Fig.11 Top view
Step 6: Fig.12 shows the pieces of the container cut in half to create the side brush holder. Fig.13 shows the container on its side. Fig.14 shows the finished container with the art brushes.

Fig.12 Pieces
Fig.13 Finished
Fig.14


Other post that are brush containers:
Home Made brush Holder with all Plastic Parts:


  • Cookie Alert: European Union laws requires that you know that this blog uses cookies. If you are concerned about this please click here to see how Google uses this information.

 
Note: Light in Dark Artwork assumes no liability for omissions, errors or the outcome of any Artist projects. All rights reserved. © Copyright 2011-

Tuesday, September 6, 2016

Home Made Brush Holder with all Plastic Parts - Part 5 of 6 - Painting

This is a Artist Brush holder and cleaner
Fig.1 Brush Accessories
By Gary Boutin

Tools and Supplies:
Aviation metal Snips
Brushes Long Handle 
Channellocks pliers
Cordless 12-volt Drill with drilling bits (Ryobi ) 
DAP Kwik Seal Silicone Caulking
Duct tape (cloth)
Drill Bit (Ryobi Drill Bits) 
Electrical Ties (small)
Gloves leather 
Metal Hardware Cloth
Paper (for template)
Pencil
Plastic Container 1-Gallon (old joint compound tub)
Plastic Fencing  (Poultry Netting)
Strong Scissors
Westpack Material All Purpose Tub

There plenty of ways to spend money on art. This post is all about saving money and spending it on paint. We need the extra accessories and many do purchase them like Fig.1 above right. This is an upcycling project.

This post shows the four steps on the assembly of a brush holder. 

Step 1: Fig.2 and Fig.3 shows the finish project. The brushes are in place and safe. Use them to paint or to store them.
This brush holder is finished but unpainted
Fig.3 Finished
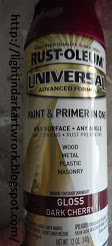
Step 2: Fig.4 shows the paint chosen is Paint and Primer Gloss Dark Cherry.
This is Rust-Olem Plastic Red Spray Paint
Fig.4 Paint

Step 3: Fig.5 shows to start spaying the paint on the bucket. Spin the bucket as the paint is being sprayed.
This is just the first coat of spray paint
Fig.5 First spin

 Step 4: Fig.6 shows this is the first coat, now let dry outside. Fig.7 letting dry outside.
Spraying the first coat around the plastic tub
Fig.6 First coat Let dry
This tub after spraying let it dry outside
Fig.7 Let dry outside
Home Made brush Holder with all Plastic Parts:
    Other post that are brush containers:


    • Cookie Alert: European Union laws requires that you know that this blog uses cookies. If you are concerned about this please click here to see how Google uses this information.

     
    Note: Light in Dark Artwork assumes no liability for omissions, errors or the outcome of any Artist projects. All rights reserved. © Copyright 2011-