Showing posts with label Art paper. Show all posts

Tuesday, July 11, 2017

How to Make Homemade Plastic Art Combs - Part 1 of 7 - The Tools

Fig.1 Homemade plastic comb
By Gary Boutin

Tools and Supplies:
Art paper
Aviation cutters
Acrylic paint (Poster paint)
Liquitex Deep Portrait Pink paint
Plastic Art Combs
Plastic bottles (Including water bottles)
Plastic fruits containers
Scissors
Utility knife (with sharp new blades)
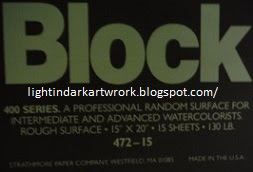
Watercolor Block Rough Block 472-15 Series (15 by 20 in.)

Art Combs are used for kid's art and each comb provides four choices of patters for the artist. But why not use these combs for adult art. Need that extra special texture or pattern, create your own art combs. Blick Art Materials® is my art art store of choice, sells a pack of four Roylco Paint Scrapers® for their price of $5. The pack has 4-patterns and are easy to clean and use.

This post shows how easy to make, use, and clean your own art combs. Each comb will be tested on watercolor paper. When the combs are created, the artist is in complete control of what shape is being made and this can add fabulous and interesting shapes to your painting.

This post shows three steps of the tools needed to make inexpensive art combs.

Step 1: Fig.2 through fig.6 shows the plastic bottles and plastic fruits containers used to make these plastic combs. When you purchase fig.2 water, fig.3 naked juice, fig.4 fruit juices, fig.5 strawberries containers, fig.6 yogurt containers, can be used to provide the medium (plastic structure) for your combs.
Fig.2 Opaque 
Plastic
Water Bottle
Fig.3 Semi Clear 
Naked
Juice Bottle
Fig.4 Clear
Plastic
Juice Bottle


Fig.5 Strawberries containers
Fig.6 Yogurt containers


Step 2: Fig.7 and fig.8 shows the cutting tools needed, aviation cutters and utility knife with a sharp blade. The aviation cutter are used because some of the plastic is to dense to cut with just a utility knife and the best reason is that it is a safer tool than using a utility knife with a sharp blade. Fig.8 shows strong sharp scissors can help cut the shapes into the plastic walls of each containers.

Fig.7 Aviation Cutters
and Utility Knife
Fig.8 Strong scissors

Step 3: Fig.9 and fig.10 shows paint and paper. Any type of paint can be used to test each comb. For example poster paint which is inexpensive to purchase can be used to see if the comb give the effect that is needed. For this post Liquitex Deep Portrait Pink paint was used. Fig.10 shows Block Watercolor Rough Block 472-15 Series (15 by 20 in.). Any type of art paper that can absorb water is perfect to see if the comb produces the effect needed for the painting.

Fig.9 Liquid paint
Fig.10 Watercolor Paper

Interesting Links about combs:


  • Cookie Alert: European Union laws requires that you know that this blog uses cookies. If you are concerned about this please click here to see how Google uses this information.

 
Note: Light in Dark Artwork assumes no liability for omissions, errors or the outcome of any Artist projects. All rights reserved. © Copyright 2011-

Tuesday, November 1, 2016

How to Make a Leaf Styrofoam Stamp

Fig.1 Leaf on Styrofoam™
By Gary Boutin

Tools and Supplies:
Art paper
Acrylic paint
Packing Foam similar to Styrofoam™
Plant leaf
Scissors

As the brushes post were being written I decided to try to use some packing foam (similar to Styrofoam™) to make some paint imprints that could be used on paper or canvas. This is a simple leaf foam pattern. This post shows how easy any vegetation pattern can be cut to fit your artistic needs. Another reason to use packing foam is it give the foam another useful life rather then living in a land dump. It can also serves has another potential tool in your artist studio and its free.

This post shows the three steps on how to assemble a black foam leaf pattern stamp. It also shows other artistic forms that can be used in stamp printing. 

Step 1: Fig.1 through fig.4 shows the assembly of the leaf stamp. Fig.1 shows to place a tree leaf on the packing foam and cut around the leaf. Fig.2 shows the black packing foam that was trimmed to be the stamp. Fig.3 shows the leaf and the branches. Fig.4 shows the completed stamp with a handle.
Fig.2 Foam packing
Fig.3 Branches and leaf
Fig.4 Tree stamp 
with handle
Step 2: Fig.5 through fig.7 shows what the leaf stamp looks like on paper. Fig.5 shows the stamp on the paper. Fig.6 shows to place your thumb on the stamp and fig.7 shows the paint on the stamp.

Fig.5 Place on canvas
Fig.6 Press with thumb
Fig.7 Notice paint on paper 
and brush stamp
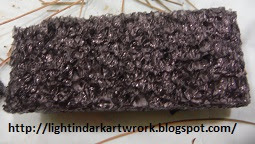
Step 4: Fig.8 shows the stamp after washing. It has fallen apart but it is still usable. The stamp would have been better with a smaller handle. It was fun to make and a fun discovery of its effect on paper. It is not artist quality, but it can make a child smile and its is inexpensive to make and to use. That might be the best reason to use it.
Fig.8 After washing


  • Cookie Alert: European Union laws requires that you know that this blog uses cookies. If you are concerned about this please click here to see how Google uses this information.

 
Note: Light in Dark Artwork assumes no liability for omissions, errors or the outcome of any Artist projects. All rights reserved. © Copyright 2011-

Tuesday, October 25, 2016

How to Make a Pine Needle Brush - Part 2 of 2 - Does It Work?

Fig.1
By Gary Boutin

Tools and Supplies:
Art paper
Acrylic paint
Pine needle brush (Made earlier)

The first post showed how the Pine Needle Brush was assembled. This post will show how the pine needle worked on watercolor paper and if this is a brush that can land in your studio.

This post shows the five steps whether this pine brush is fit for an art studio.

Step 1: Fig.1 shows Strathmore Water Color Paper used in these examples and fig.2 shows the paper is ready to be used. Fig.3 shows Liquitex Basic Aquamarine will be used to highlight the each examples.
Fig.2 Blank paper
Fig.3 Liquitex Basics
Aquamarine
Step 2: Fig.4 through fig.6 shows the paints used in these example: FolkArt Metallic Artist Quality Craft Red paint, Liquitex Artist Color Bright AQua Green and Ultra Gloss Acrylic Enamel 
Cadmium Yellow. These are the colors used in this example.
Fig.4 FolkArt 
Metallic Artist 
Quality Craft 
Red paint
Fig.5 Liquitex Bright 
AQua Green
Fig.6 Ultra Gloss 
Acrylic Enamel 
Cadmium Yellow
Step 3: Fig.7 shows the pine needle brush and fig.8 shows the pine brush on the top of the watercolor paper. The brush doesn't really paint what is does is sweep the paint across the paper. The brush has little control, and this brush could never do fine detail work, its like working with a broom.

Fig.7 Pine needle brush
Fig.8 First pass
Step 4: Fig.9 and fig.10 shows more passes from pine tree brush. This is not a worthy brush to add to a studio. It might work on a large canvas but not on little ones.

Fig.9 Second pass
Fig.10 Last pass

Step 5: Fig.11 and fig.12 shows the final reason why pine tree brushes are not used in the industry. They fall apart when washed in the sink. They fall apart when paint is added to the brush and the debris sheds all over the paper canvas. This job was a failure, but the adventure was worth it. Just because they are plenty of materials for a brush does not mean that it can be used artistically. The next set will be about How to Make a Bottle Brush. The difference is this post is that this brush is a live plant the other are not.
Fig.11 Uneven 
pine needles
Fig.12 Falling 
pine needles
How to Make a Pine Needle Brush:


  • Cookie Alert: European Union laws requires that you know that this blog uses cookies. If you are concerned about this please click here to see how Google uses this information.

 
Note: Light in Dark Artwork assumes no liability for omissions, errors or the outcome of any Artist projects. All rights reserved. © Copyright 2011-
Sunday, October 23, 2016

How to Make a Bird of Paradise Art Brush - Part 2 of 2 - Does It Work?

Fig.1 Bird of
Bird of Paradise Flowers
By Gary Boutin

Tools and Supplies:
Art paper
Acrylic paint
Bird of Paradise Brush

When this Bird of Paradise flower brush started there might have been a fifty percent chance of working. In the Chino neighborhood there seem a huge abundance of these plants and flowers. It would rain and the flowers just seem to swim in the water and the wind. This gave me the idea of this project. Could this flower be made into a brush, and could it last enough to finish a painting. Most of these answers are answered in this post.

This post shows the five steps on the use of a Bird of Paradise Art Brush.

Step 1: Fig.1 shows a beautiful Bird of Paradise Flower and fig.2 and fig.3 shows Strathmore Water Color Paper used in these examples.
Fig.2 Strathmore 
Water Color Paper
Fig.3 Paper is ready
Step 2: Fig.4 through fig.6 shows the paints used in these example are Liquitex Basic Aquamarine, FolkArt Metallic Artist Quality Craft Red paint, and Liquitex Concentrated Artist Color Bright AQua Green. These are the colors used in this example.
Step 4 Liquitex 
Basic Aquamarine
Step 5 FolkArt 
Metallic Artist 
Quality Craft Red
Step 6 Liquitex 
Bright AQua Green

Step 3: Fig.7 shows a close up of the Bird of Paradise (Strelitzia /strɛˈlɪtsiə/[1]. ) Fig.8 shows the Bird of Paradise brush from the first post. Fig.9 shows the brush dry using paint and its brush strokes.
Fig.7 Bird of Paradise ((Strelitzia)
Fig.8 Bird of Paradise Brush
Fig.9 Dry brush scratches
Step 4: Fig.10 through fig.12 shows the paint in a plastic tray. Fig.11 shows that this time the brush was used with water and it seem to work better. There was no loose debris and the brush seems to pull the paint on the paper. Fig.12 shows a close up of this process. So wet it works fine and the flower does not fall apart when used within the acrylic paint or wet with water.
Fig.10 Used with Water
Fig.11 Bird of Paradise
Fig.12 Close up
Step 5: Fig.13 shows the Bird of Paradise Art Brush after it has been cleaned and rinsed in the sink. This brush is to big for detail work. If there are plenty of bird of Paradise in your area, this might be a fun project. The next post will discuss the Pine tree Brush, its assembly and its possible use in your studio.
Fig.13 Completed

How to Make a Bird of Paradise Art Brush:
  • Cookie Alert: European Union laws requires that you know that this blog uses cookies. If you are concerned about this please click here to see how Google uses this information.

 
Note: Light in Dark Artwork assumes no liability for omissions, errors or the outcome of any Artist projects. All rights reserved. © Copyright 2011-